
In this article
- What is a Mobile App Wireframe?
- Sketch, wireframe, mockup or prototype?
- Review states as well as the main path
- Benefits of Creating a Wireframe for Your Mobile App
- Planning Your App Wireframe
- Designing Your Wireframe
- Refining Your Design
- Creating Interactive Wireframes
- Best Practices for Mobile App Wireframes
- Collaborative Wireframing and Feedback
- Exporting and Delivering Your Wireframe
- Mobile App Wireframe Examples and Inspiration
- Conclusion
What is a Mobile App Wireframe?
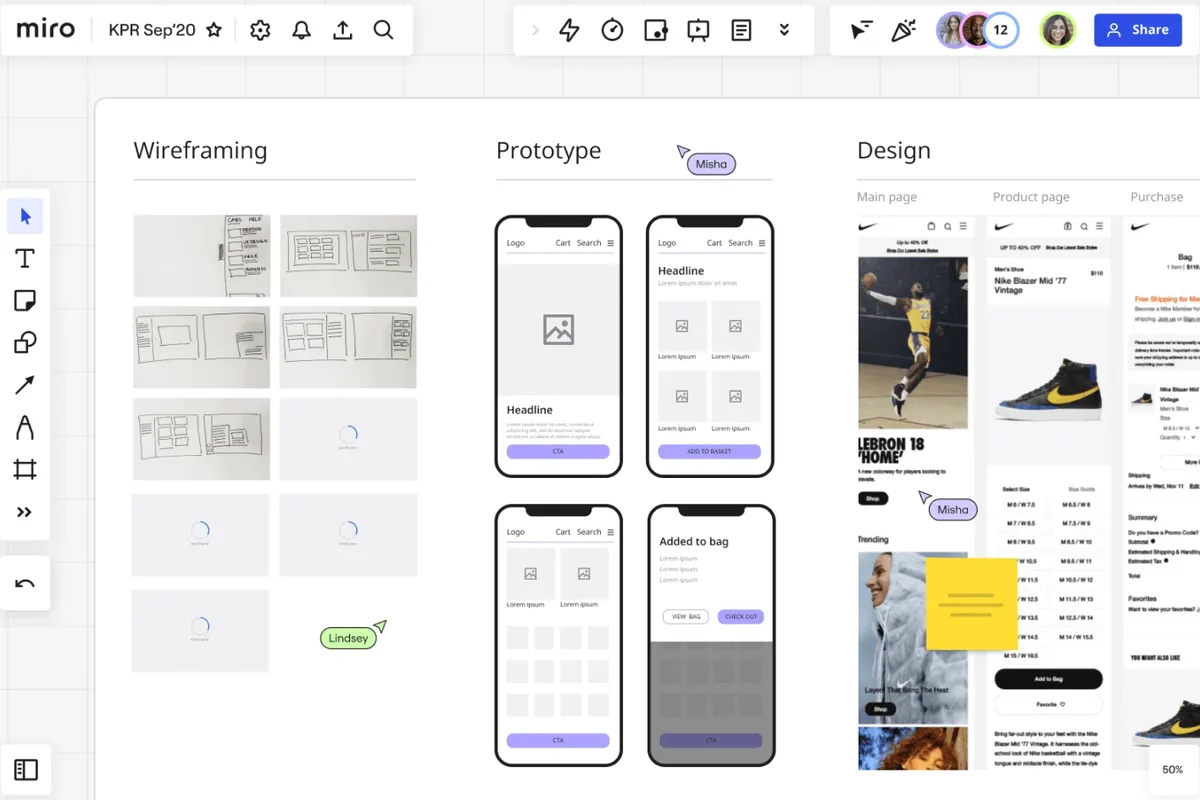
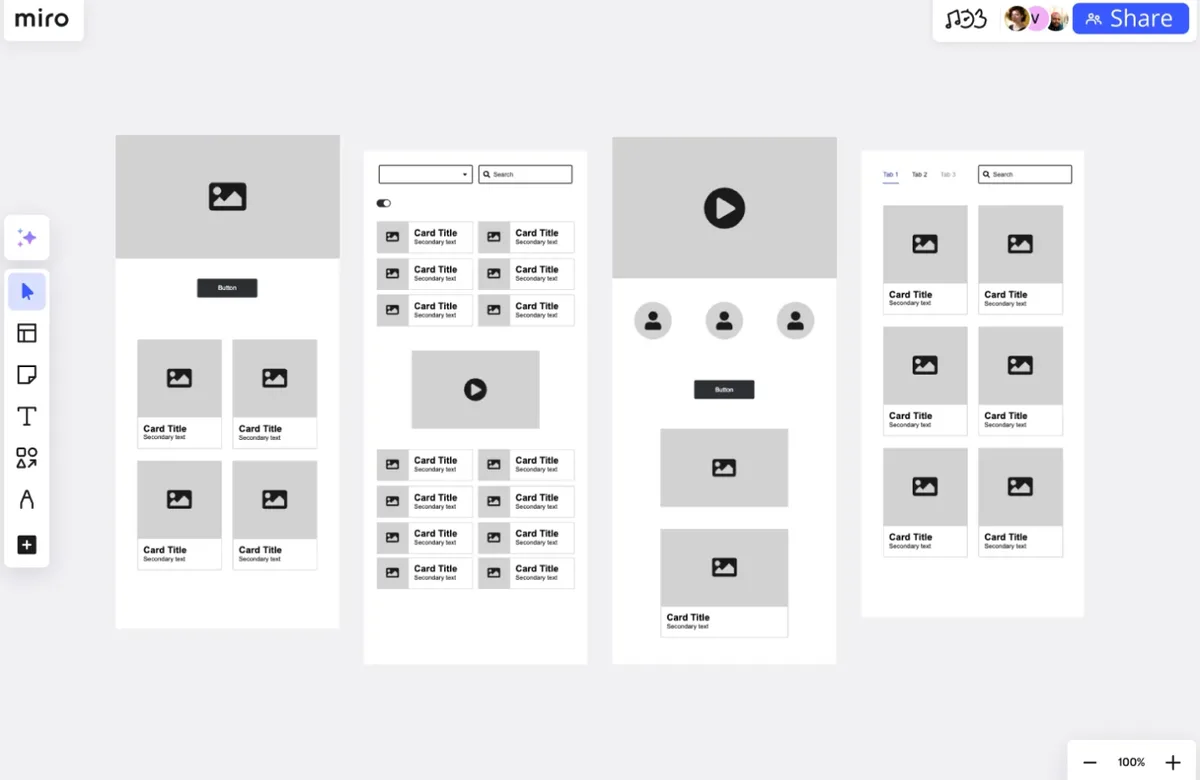
In mobile app development, a mobile app wireframe serves as a blueprint for your app’s design and functionality. Essentially, it’s a low-fidelity sketch or digital visualization of the app’s structure, layout, and user journey. The mobile app wireframe offers a glimpse into how the app will operate, identifying the user flows, the layout of UI components, and the interaction points.
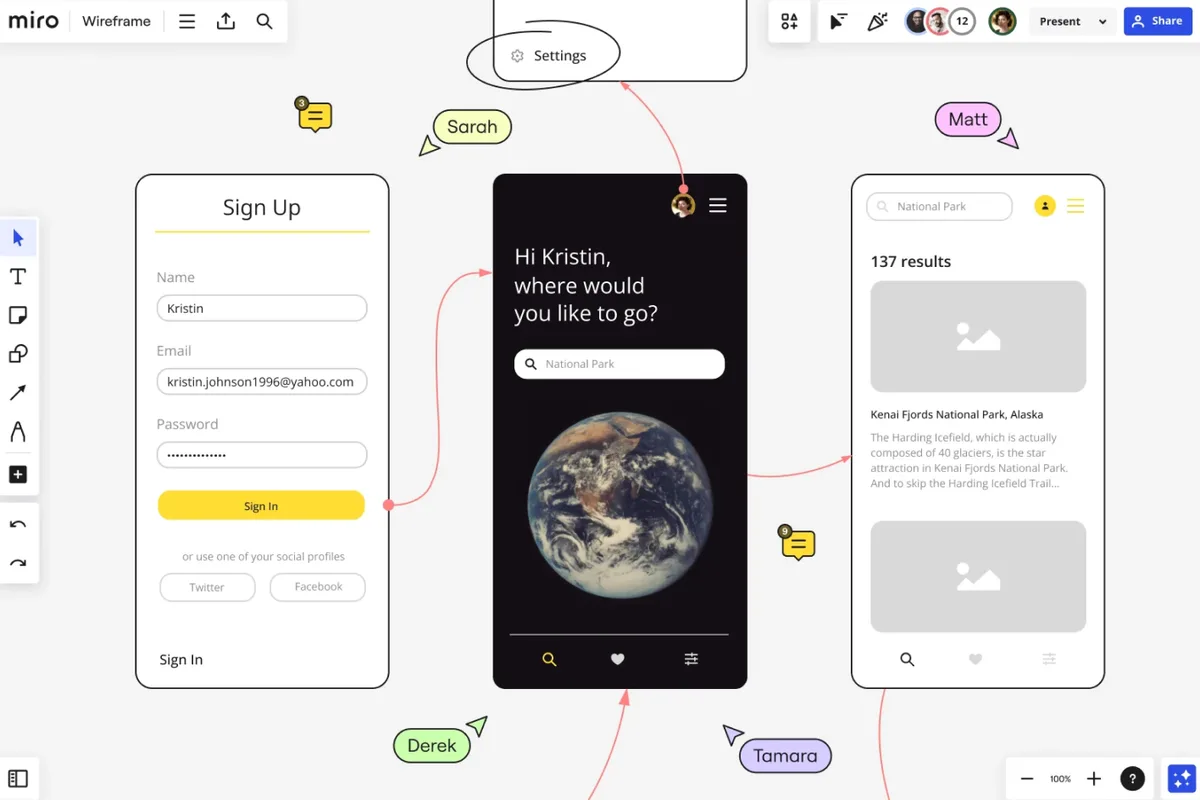
Source: miro
Wireframing saves time, resources and effort by exposing design problems before they become expensive development work. ANODA turns disconnected screens into a coherent journey, so your team can align on the structure, spot missing steps and move into visual design with confidence.
Sketch, wireframe, mockup or prototype?
| Artifact | Main purpose | Limit |
|---|---|---|
| Sketch | Explore alternative ideas quickly | Does not specify every screen or behavior |
| Wireframe | Describe structure, content and task connections | Does not establish production functionality |
| Mockup | Review visual treatment with representative content | A static mockup does not simulate a complete task |
| Prototype | Simulate selected interactions for a review | Simulated behavior is not an implemented service |
There is no mandatory sequence through these artifacts. A wireframe can be connected into a prototype, and a team may return to sketches when a task changes. Select the artifact for the decision being made rather than treating fidelity as proof of readiness.
Review states as well as the main path
Map entry points, permissions, empty and loading states, errors, interrupted actions and recovery. State which outcomes are simulated. Design the success state together with the loading, failure and recovery paths, so developers have a complete behavior to implement.
Before handoff, record the task, screen coverage, annotations, assumptions, open questions and design and engineering owners. Use those decisions to give designers, stakeholders and engineers one shared direction.
Benefits of Creating a Wireframe for Your Mobile App
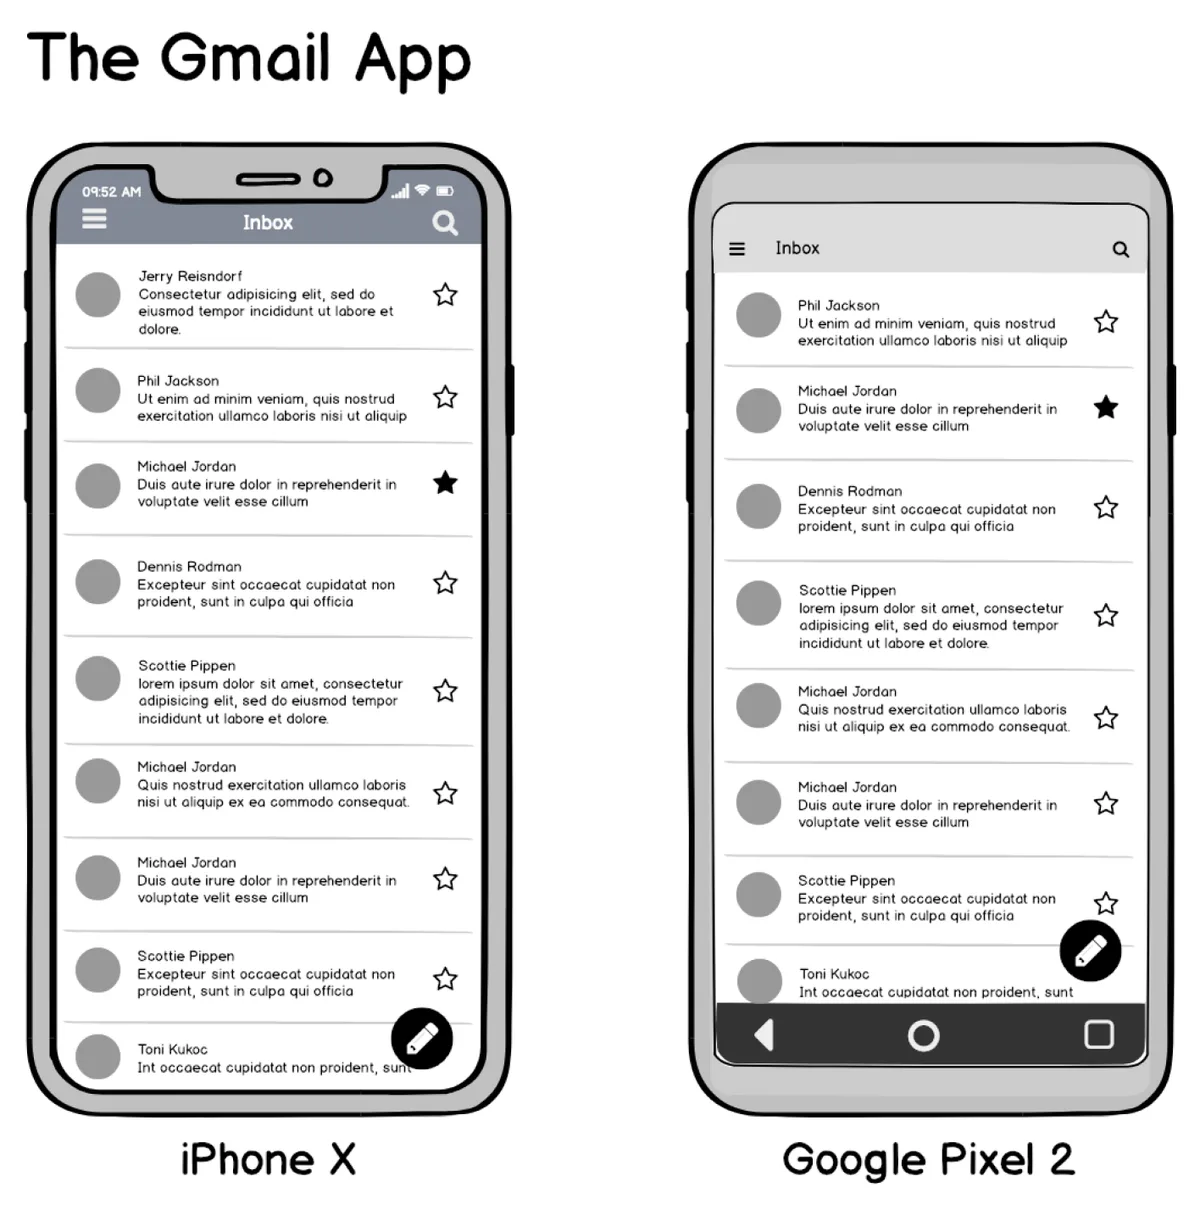
Source: balsamiq
Developing an app wireframe brings a host of benefits to both the design and development process. It provides clarity in visualizing the user flow, makes communication between teams more seamless, and helps identify areas for improvement before heavy resources are invested.
- Enhanced Communication: A shared wireframe provides a reference for discussion. Record decisions, assumptions and unresolved questions so different interpretations can be identified.
- Refined Design Ideas: Wireframes allow for easy iteration. Designers can compare alternatives against specific tasks and evidence before committing to an implementation.
- Improved Visual Flow: Reviewing a wireframe can expose missing steps or unclear navigation. Verify whether the proposed correction helps people complete the task.
Planning Your App Wireframe
Identify Your Target Audience and Their Needs
The first step in creating a successful app wireframe is understanding your audience. Your mobile app wireframe must align with the behaviors and needs of your target users. Investigate relevant tasks, circumstances, constraints and pain points; collect demographic details only when they inform the design question. Use relevant findings to guide design decisions and document how each proposed flow addresses the task. Use personas when they help the team remember the findings; keep real tasks at the center of the mobile app.
Determine the Core Features and Functionalities of Your App
Source: miro
For a smooth wireframing process, prioritize the core features that will differentiate your app. Focus on features that are both crucial and feasible from a technical standpoint. At this wireframe stage, you’ll want to ensure that the essential features, such as UI elements and navigation flows, are easy to follow and understand.
Research Your Competitors and Market Trends
Study similar apps to uncover strengths and weaknesses. Inspect their visible task flows and identify ideas to investigate. Learn from the competitor’s visible flow, then choose the pattern that solves your users’ task.
Designing Your Wireframe
Source: balsamiq
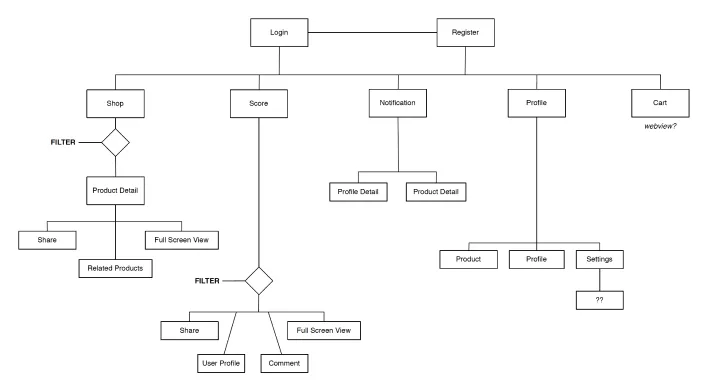
Sketch Out the Core Part of the User Flow
Starting with a rough sketch is a key part of the app wireframing process. Use basic shapes and lines to sketch out the core user flow. Focus on the most critical screens and the primary user interactions. A free wireframe tool or sketching software can assist you in making this low-fidelity wireframe digital and shareable.
Map Out a Target User Flow and Identify Key Screens
After sketching the user flow, it’s time to identify the key screens. A wireframe tool can be used to create a digital version of your user flow, mapping out the journey the user will take within the app. Choose UI components that support the task, then review the complete flow. ANODA connects those controls into a clear journey, including the states that users need when something goes wrong.
Source: balsamiq
Populate Each Screen with Essential Elements
Each screen in your app wireframe should be populated with the necessary UI elements. Focus on usability and ensure each screen has a clear, logical purpose. For example, a sign-in screen may need account identifiers, a supported authentication method, recovery actions and relevant error states. Include radio buttons only when the task requires a choice between mutually exclusive options. Keep the design focused to maintain a clear visual hierarchy and make it easy for users to navigate the app.
Refining Your Design
Bring in Actual Copy and Ensure Content Scales Well
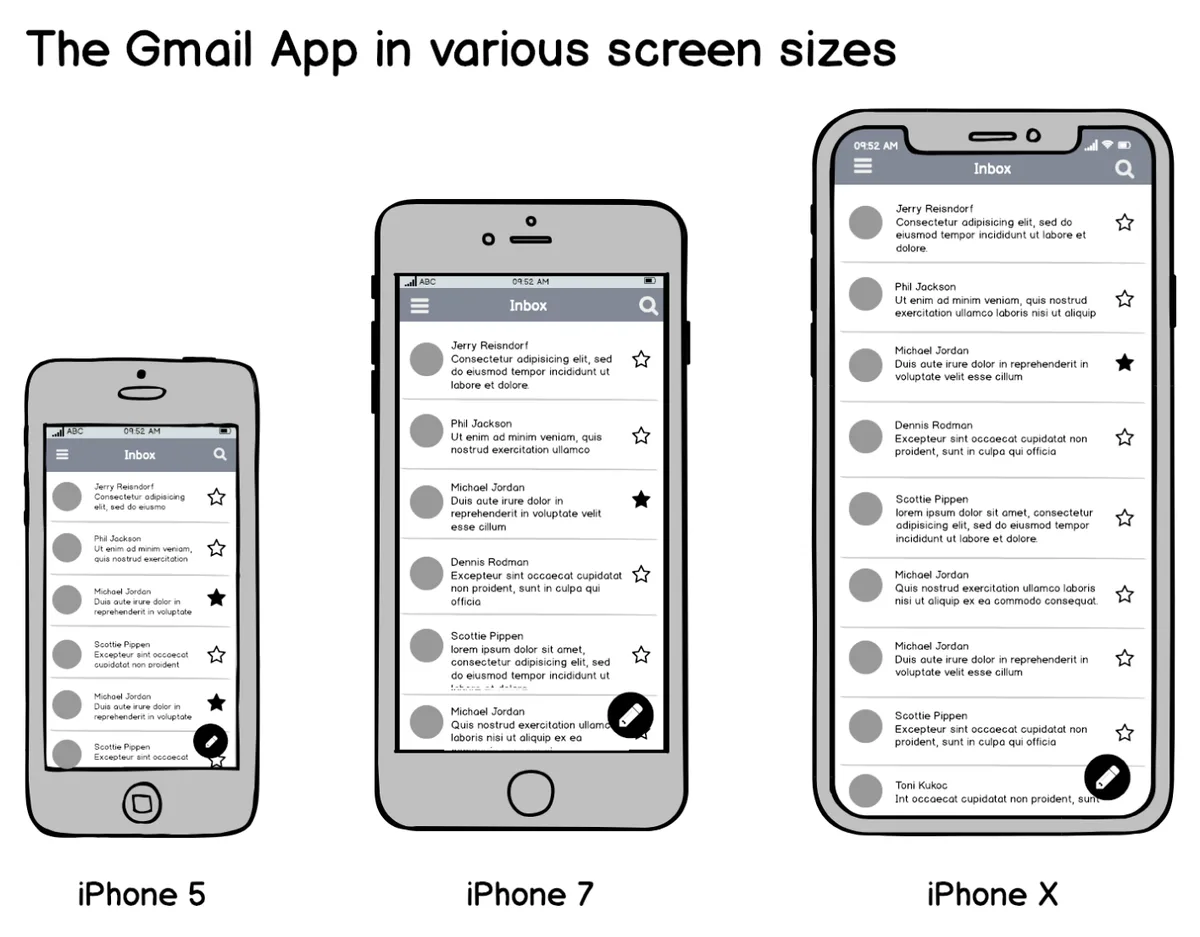
Once the structure is in place, start adding actual content to the wireframes. This is where you test how well the content scales across different screen sizes and devices. Ensuring readability and scannability at this stage is crucial for the wireframe design.
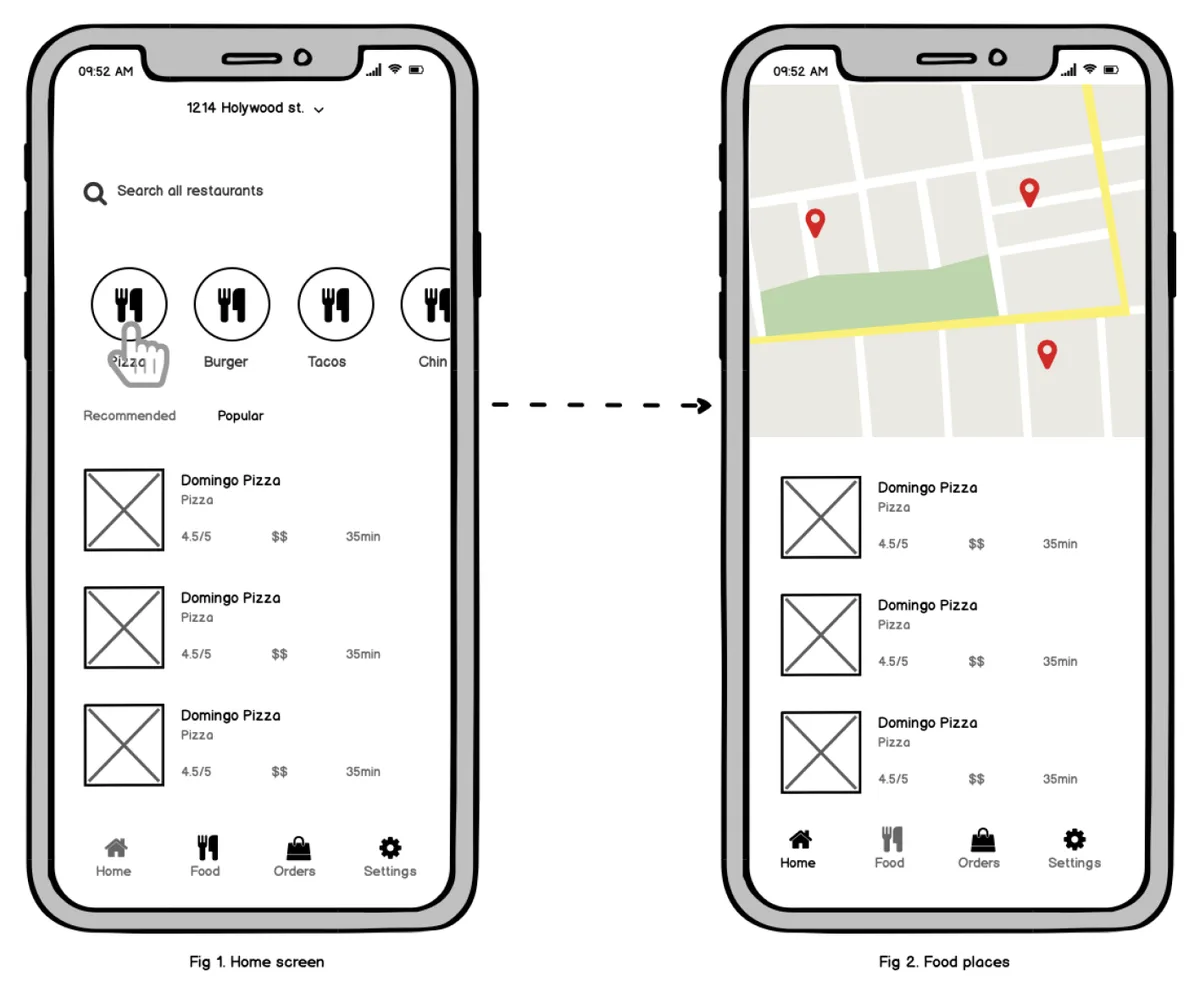
Connect Pages to Create a Flow
Use a wireframe tool to connect the screens and build a logical user flow. At this stage, you may also introduce interaction design elements, such as animations or transitions, to make the wireframe app more interactive.
Source: balsamiq
Test Your Design Decisions and Iterate on Feedback
Testing is a fundamental part of the wireframing process. Gather user feedback through user testing and make necessary adjustments to improve the usability of the mobile app wireframe.
Creating Interactive Wireframes
Use a Drag & Drop Wireframe Design Software
Choose a tool that supports the interactions needed for your review. Check its current capabilities, sharing permissions and accessibility limits before selecting it. Use the prototype to resolve interaction questions early, then carry those decisions into implementation.
Source: miro
Add Web Interactions and Mobile App Gestures
Represent relevant taps, gestures and keyboard actions when the review needs them. Hover is not available on every input method; do not make it the only way to discover essential information. Document interactions the prototype cannot simulate.
Test and Validate Your Wireframes with Users
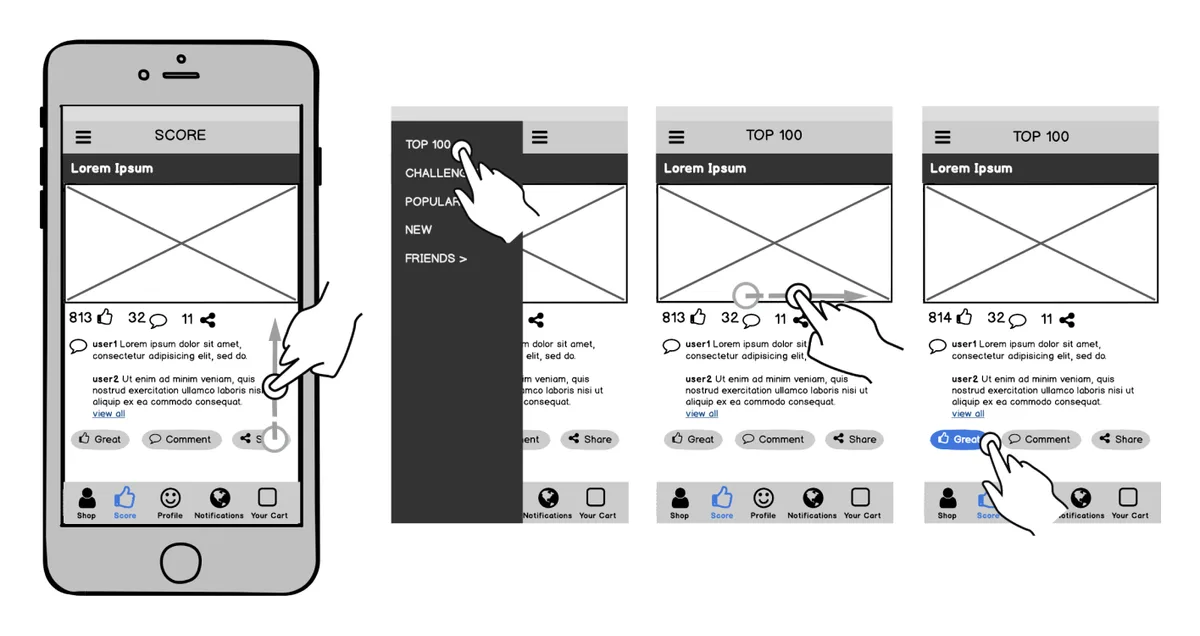
Source: balsamiq
Review specific tasks with representative participants and record where they hesitate, misunderstand or cannot continue. Distinguish observed behavior from suggested preferences. Repeat the relevant checks after changes; carry the findings into the finished interface and verify the same tasks there.
Best Practices for Mobile App Wireframes
Use a Consistent Design Language and Style Guide
Consistency is key in app design wireframe development. Follow a unified style guide for elements like ui components and navigation menus. This creates a cohesive user experience across all screens.
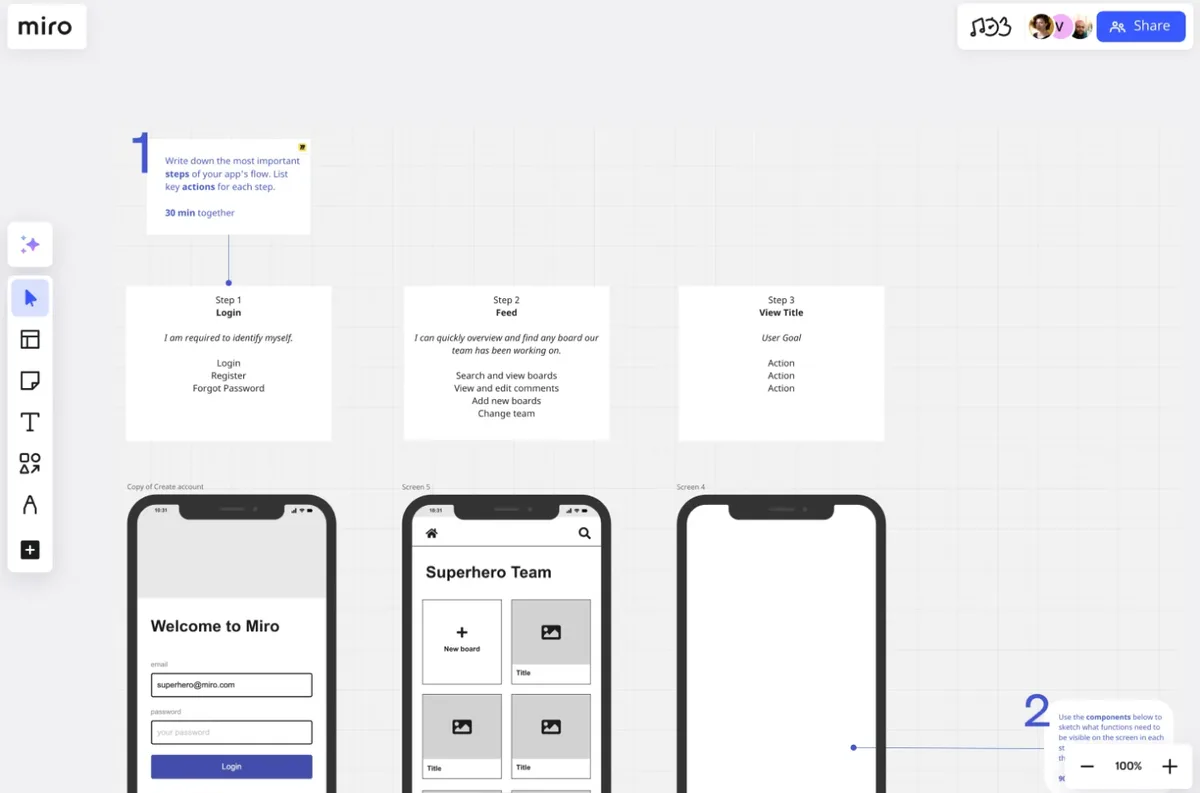
Source: miro
Ensure Accessibility and Usability in Your Wireframe
Document accessibility requirements during wireframing: labels, reading order, keyboard paths, error recovery and alternatives to gestures. Carry those requirements into implementation and test the finished interface with assistive technology.
Keep Your Wireframe Simple and Focused on Key Features
Simplicity is crucial for effective mobile wireframes. Avoid unnecessary clutter and ensure each screen only includes essential elements to support the app’s functionality. A great wireframe focuses on the user’s goals and guides them in an intuitive way.
Collaborative Wireframing and Feedback
Work with Stakeholders and Team Members to Refine Your Wireframe
Collaboration is key to a successful app wireframing process. Use collaborative wireframing tools like Figma or Sketch to gather input from team members and stakeholders.
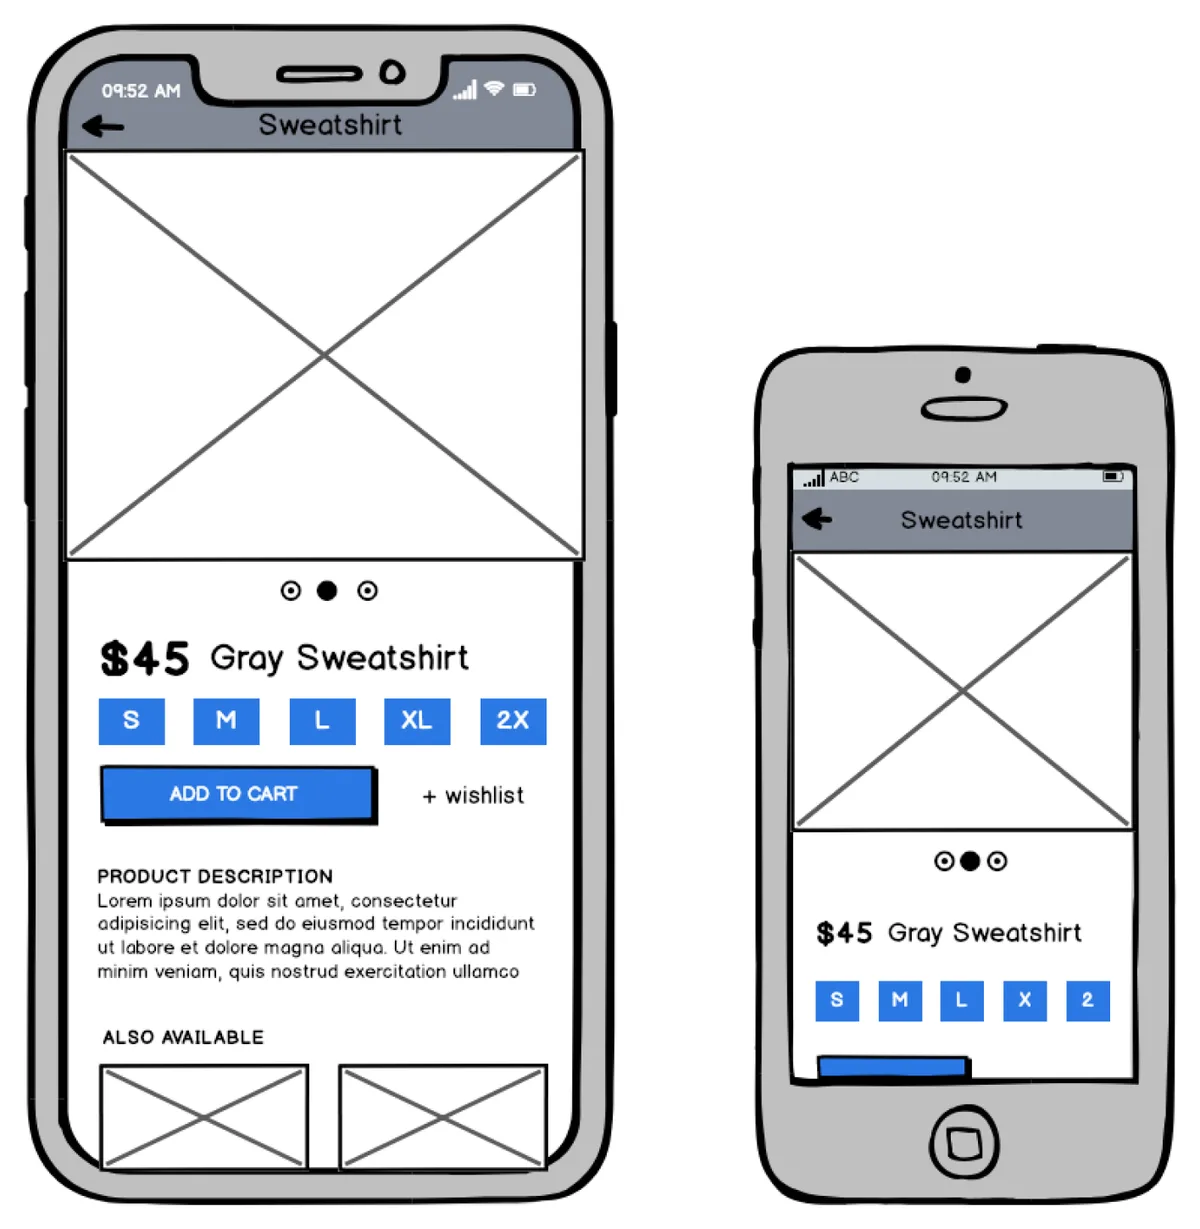
Source: balsamiq
Gather Feedback and Iterate on Your Design
Feedback is the backbone of refinement. Continue improving your app wireframe based on feedback loops from users and stakeholders.
For design scope and deliverables, see our mobile app design service. Implementation is a separate scope described under mobile app development.
Exporting and Delivering Your Wireframe
Export Your Wireframe in Various Formats
Share the agreed source file or prototype with suitable permissions. Static exports can support discussion, but they do not preserve every interaction, annotation or accessible behavior. Verify what the receiving team can inspect.
Create a Design Specification Document for Developers
Record the decisions engineers need: screen and state coverage, content, interaction behavior, constraints and unresolved questions. Agree the handoff format with the receiving team and verify their access. A clear handoff keeps engineers working from agreed decisions instead of guessing what a screen should do.
Mobile App Wireframe Examples and Inspiration
Explore Different Types of Wireframes
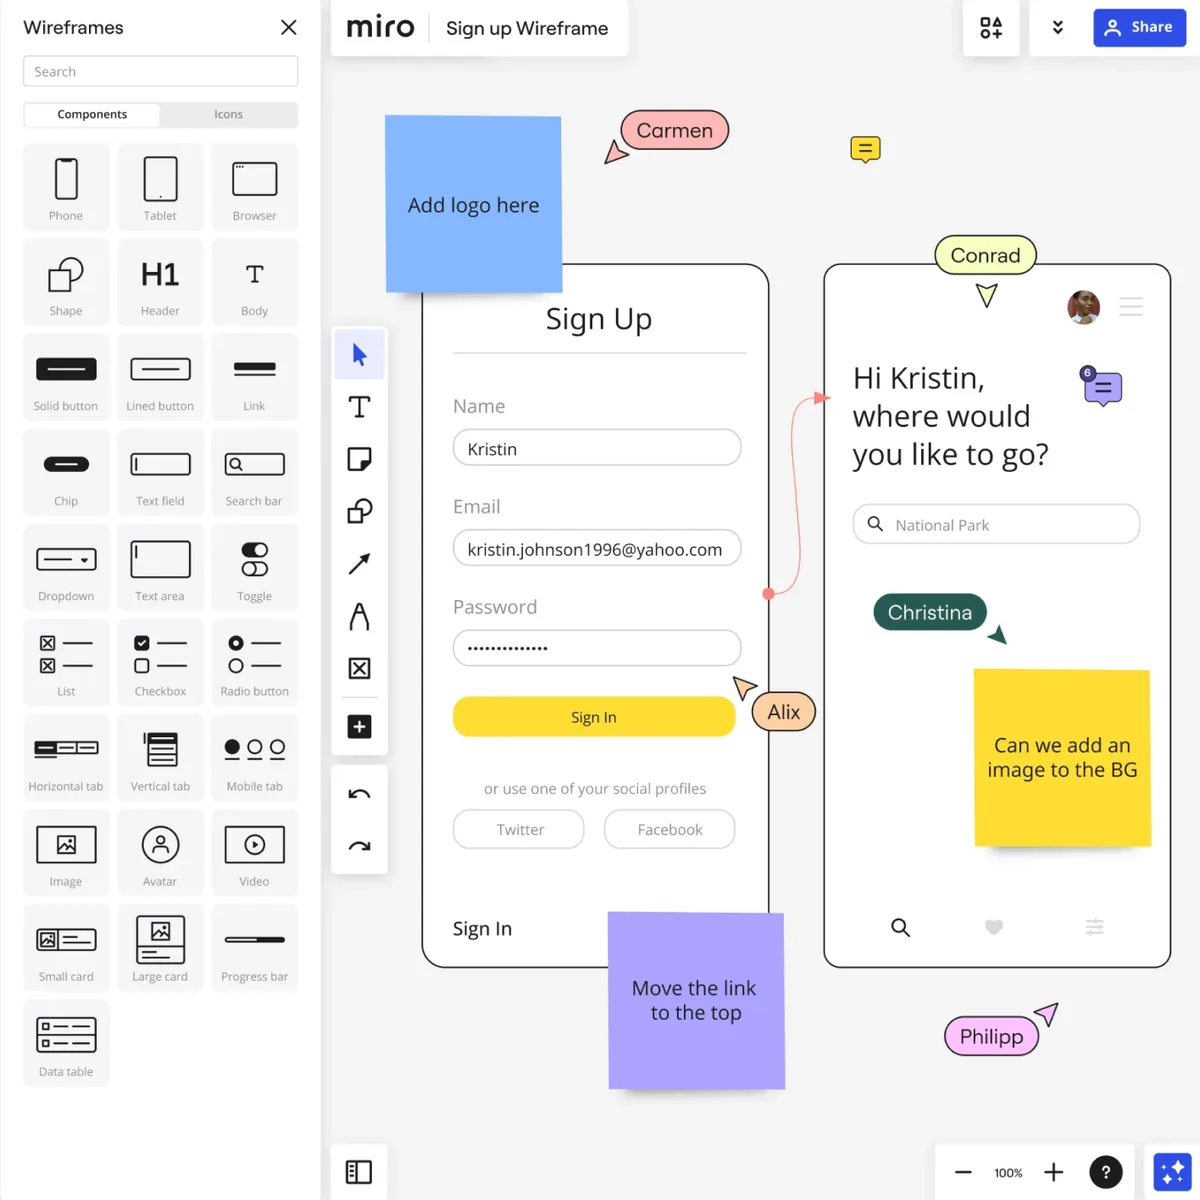
Look at examples of both low-fidelity and high-fidelity wireframes to understand the differences and when to use each. Use enough detail to answer the review question. Low-detail prototypes can support task-flow testing; visual decisions may require richer content and styling. Choose the level of detail that lets the team make a useful decision instead of polishing an unresolved flow.
Source: miro
Analyze Successful Wireframes and Identify Key Elements
Compare examples against the task you are investigating. Borrow the useful principle, then adapt it to your users and your product’s real tasks.
Conclusion
Building the wrong flow beautifully still gives you the wrong app. Wireframes let you resolve structure, content and interaction early, before your team pays to rebuild them in code. ANODA combines task-flow design, clear screen states and collaborative handoff to turn an app idea into a plan your team can act on.
Source: miro
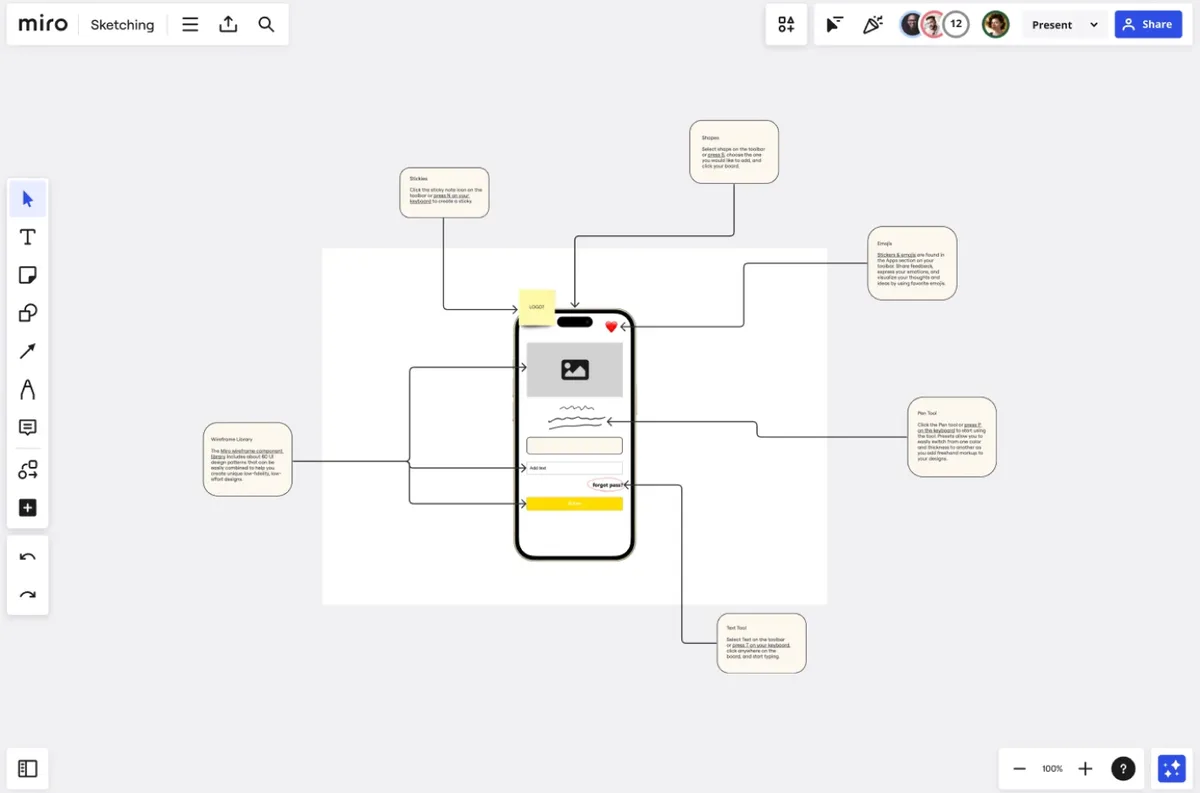
Stop carrying unresolved product decisions into development. Plan your mobile app design with ANODA and give your team a clear path from idea to experience.
Frequently asked questions
How do sketches, wireframes, mockups and prototypes differ?
A sketch explores an idea; a wireframe describes structure and content; a mockup adds visual treatment; a prototype simulates selected behavior. These artifacts can overlap, and there is no mandatory sequence for every project.
Can a wireframe prove that an app works on iOS and Android?
No. A wireframe can describe layouts and platform-specific behavior. Compatibility, permissions, performance and accessibility need verification in the implementation on supported devices.
What should a wireframe handoff include?
Include task flows, screen and state coverage, representative content, interaction annotations, assumptions, open decisions and owners. Engineering still needs to assess technical constraints and test the implementation.
Can low-detail wireframes be used for usability review?
Yes, when they represent the task and behavior being investigated. Record simulation limits and use more detail when the question depends on visual treatment or realistic content.
Written by